Scopique
 Scopique
Going back to my thoughts on creating videos, I decided that I’d come up with something to add occasional flavor to my compositions. I consider this a slippery slope because we’ve all inadvertently stumbled across videos (because no one in their right mind would seek this crap out on purpose) where the creator is just blasting the video with cuts, zooms, and on-screen popups, graphics, and other garbage. I don’t know if the creator of those kinds of videos is suffering from ADHD or is trying to appeal to the hyperactive crowd, but if there is any kind of approach that makes me close my browser immediately, that’s certainly in the top five, if not top three.
Considering how many Star Citizen videos I do, then I figured maybe I could work with that. The content would need to be reactionary in nature, so I’d want something for times when things go well, when things go not-so-well, and when the whole situation is FUBAR’d. Also, maybe something when things are silly. What better representation of these situations than clips from Star Citizen itself?
Here’s what I’ve done so far.
Get a subject
Star Citizen has “FOIP”, which is “Face Over IP” or something like that. It allows players to use their webcams to register facial expressions which are then applied to their characters. It’s kind of a cool idea, except that this game takes place in space, so most of the time characters are wearing helmets. Also, FOIP doesn’t seem to be working right now, or at least is not working for me, so the best I could do was to get some video of one of my characters with an absolutely dead-eyed, neutral expression throughout.
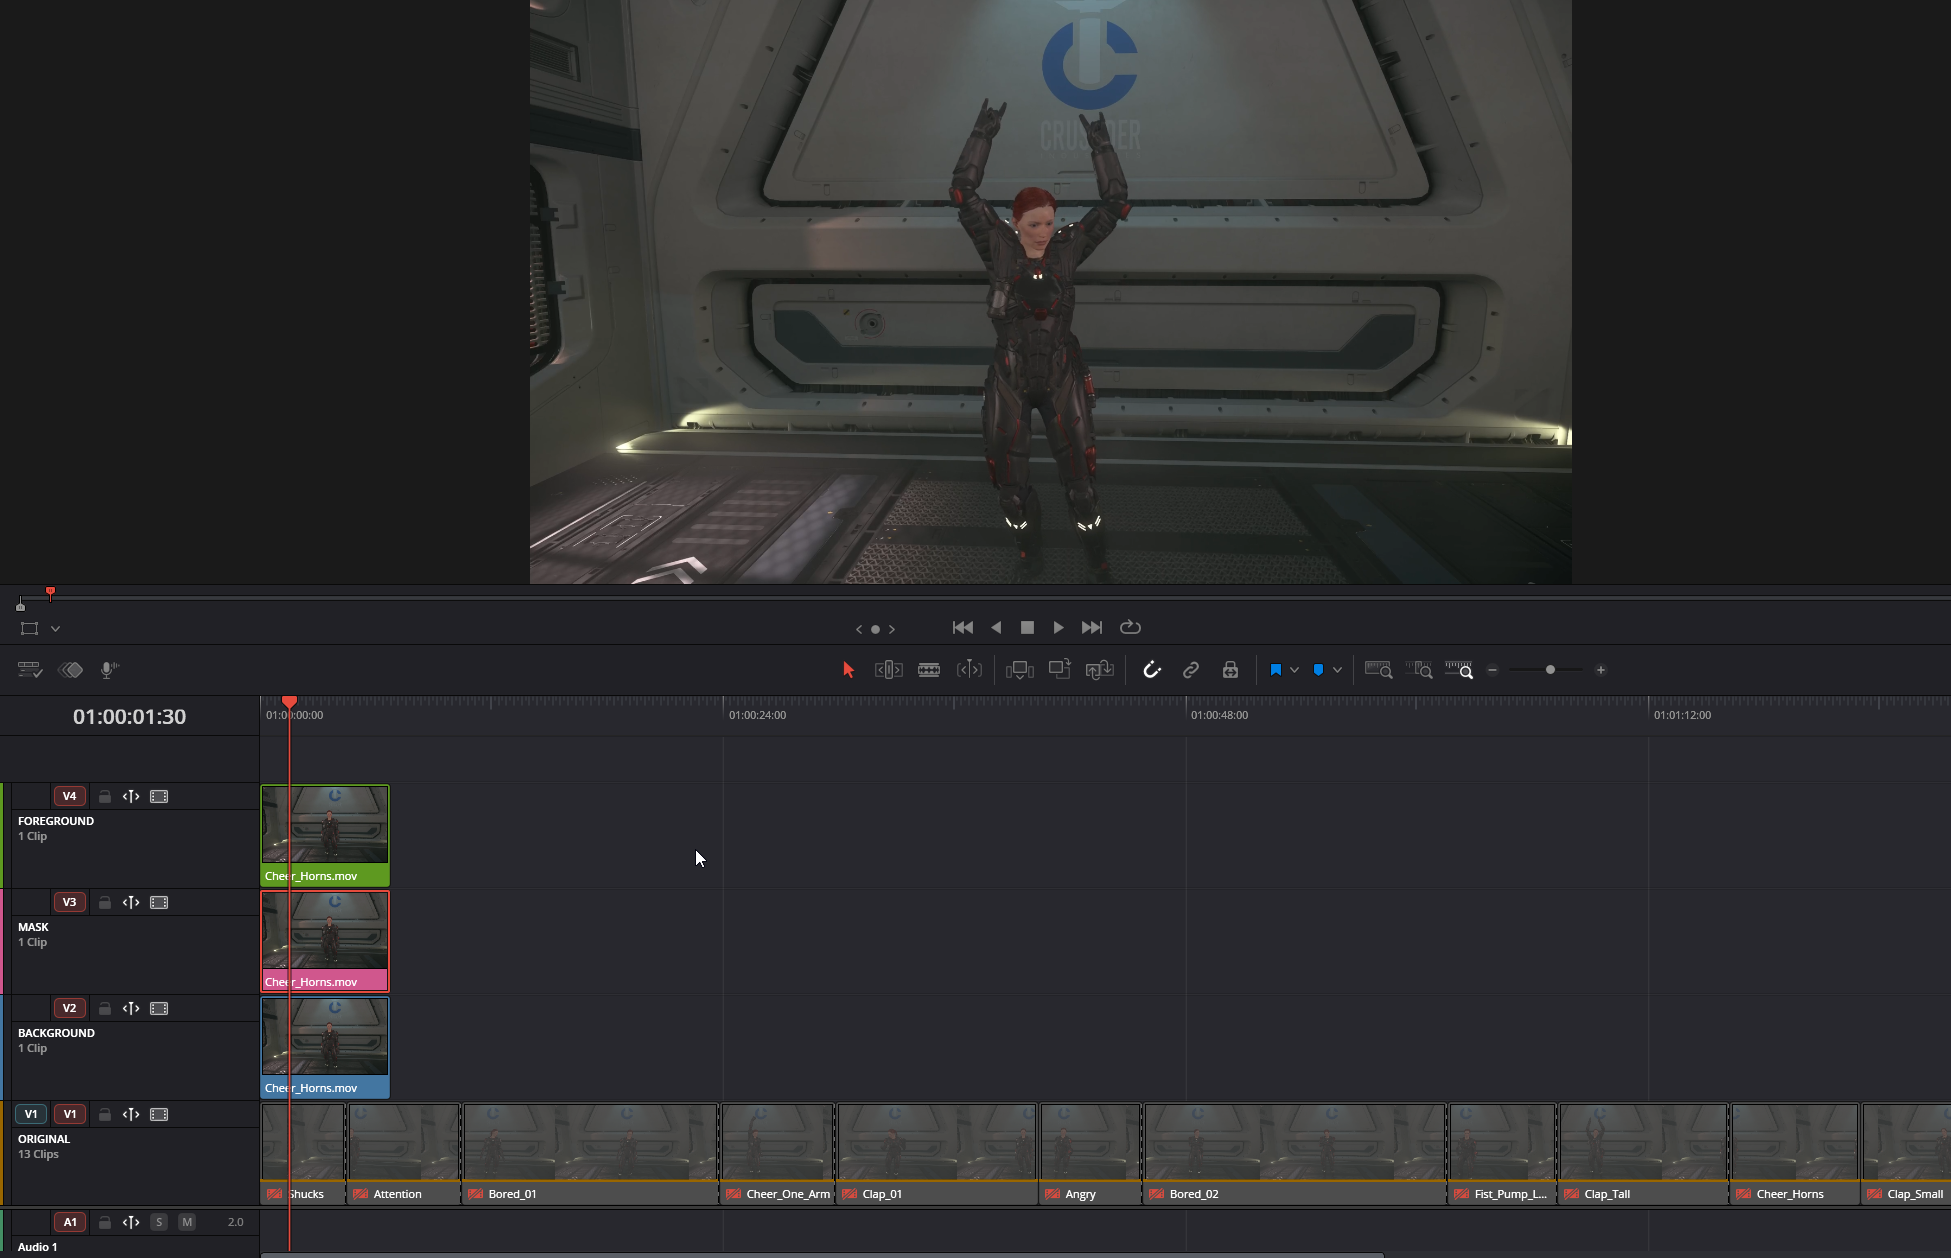
Emotes
I ran through several emotes and recorded them using the free-range camera. I had to find a suitable environment with a contrasting background, so I jumped into my Crusader Mercury which has a mostly white interior. I also flew to microTech because everything there is clean and the planet is mainly snowbound, should I need even more contrast.
I then split the recording into clips specific for each emote. I’ve got some cheering, some clapping, some boredom, and some anger in there. Each category will be well represented in future Star Citizen videos.
Setting up the clip structure
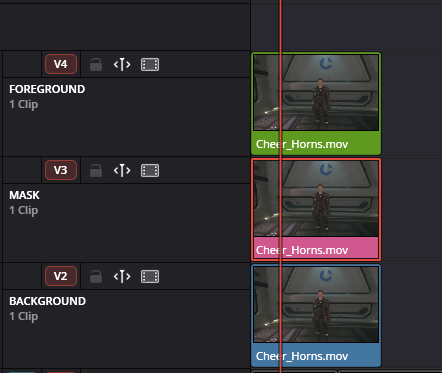
I need to have three different copies of a single clip. The bottom-most clip is the background. This will be the set-piece in cases where I want to drop something in between the subject (the character) and the scene (the background).
The middle-most clip is where I’m going to mask out the subject.
The top-most clip is the foreground. This will be what is rendered in front of everything and — when combined with the mask layer — will effectively remove everything except for the subject.
Magic Mask
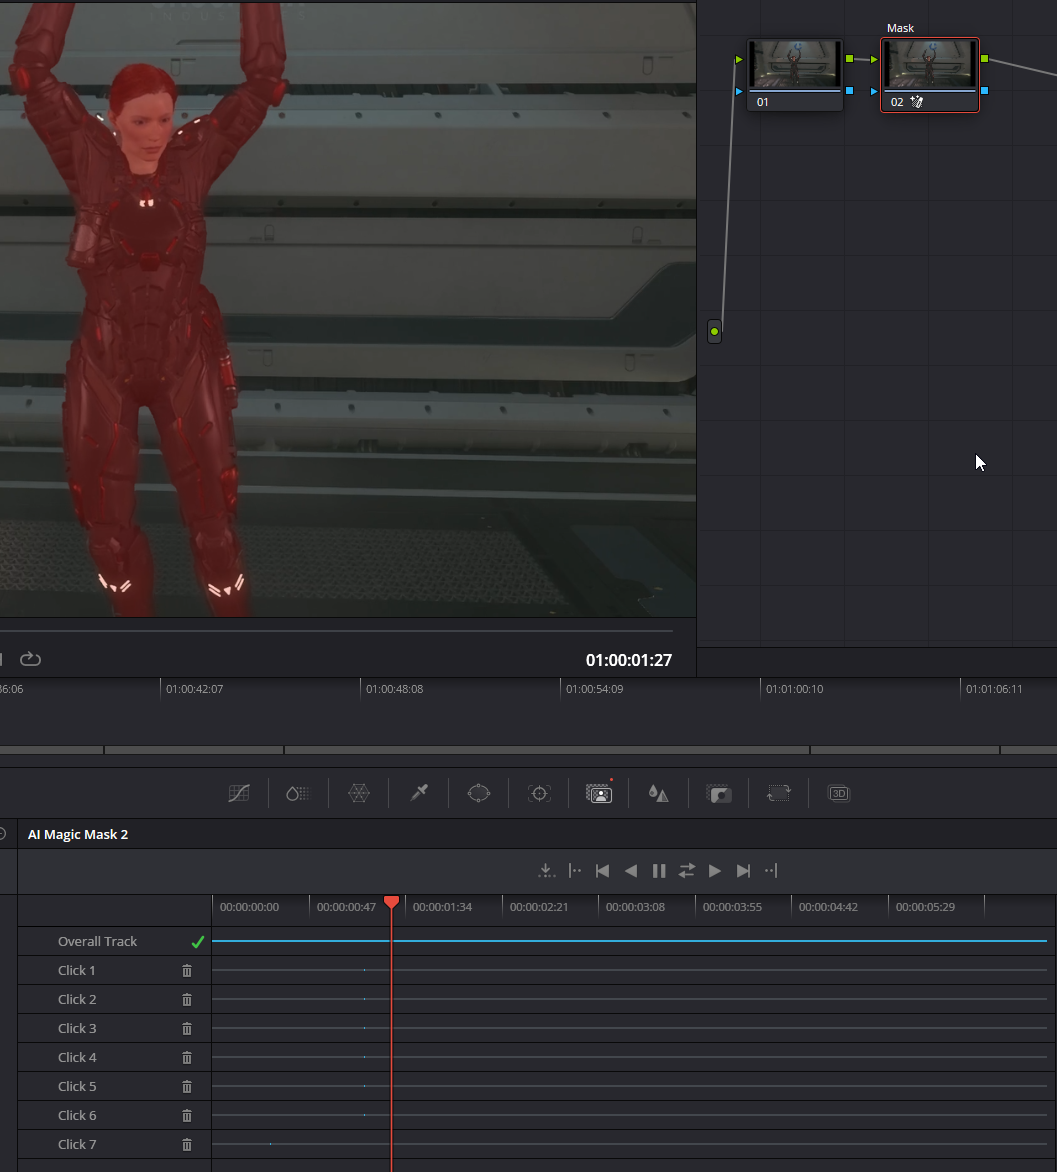
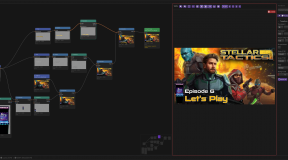
In the Color Page, I’ve selected the middle-most layer and have added an adjustment node. I could do this on the input node, but adding a node dedicated to masking makes it easy to modify color on the clip later on and not affect the mask.
Magic Mask is only available in the Studio edition of Davinci Resolve. It allows me to click on various areas of the clip, and the system will determine what parts of the clip appear to be related to where I clicked. Normally, the act of “rotoscoping” involves manually outlining a subject, and then tracking the subject’s movement over the course of the timeline. This requires addition of keyframes over time so that the outline moves with the subject. Magic Mask handles the selection and the tracking for me, and while it’s a massive upgrade over manual roto, it can be inaccurate. I had to manually add and remove some masked areas over time to get what looked like a relatively clean selection.
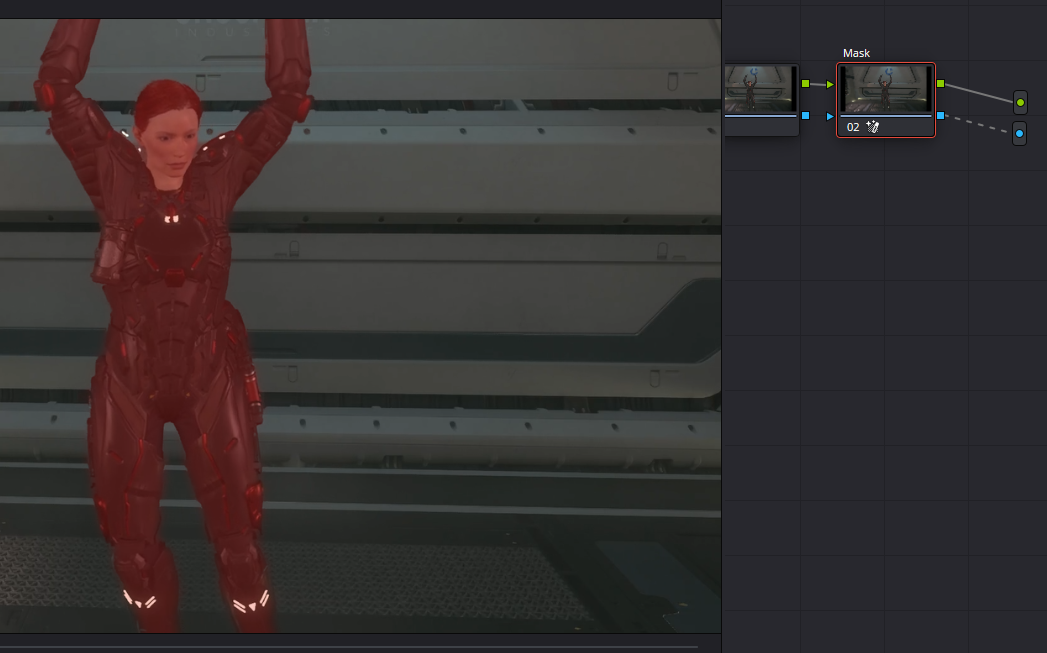
The most important part of this task, though, is that I need to create an alpha output. Right clicking on the node canvas, I selected ADD ALPHA OUTPUT which created the blue dot icon seen on the right side of the canvas. I then had to connect the alpha-out of the mask node to the alpha out dot. This will now render the masked area as solid (green dot) and will render everything else as an alpha channel (blue dot).
When we return to the editing page, we get this:
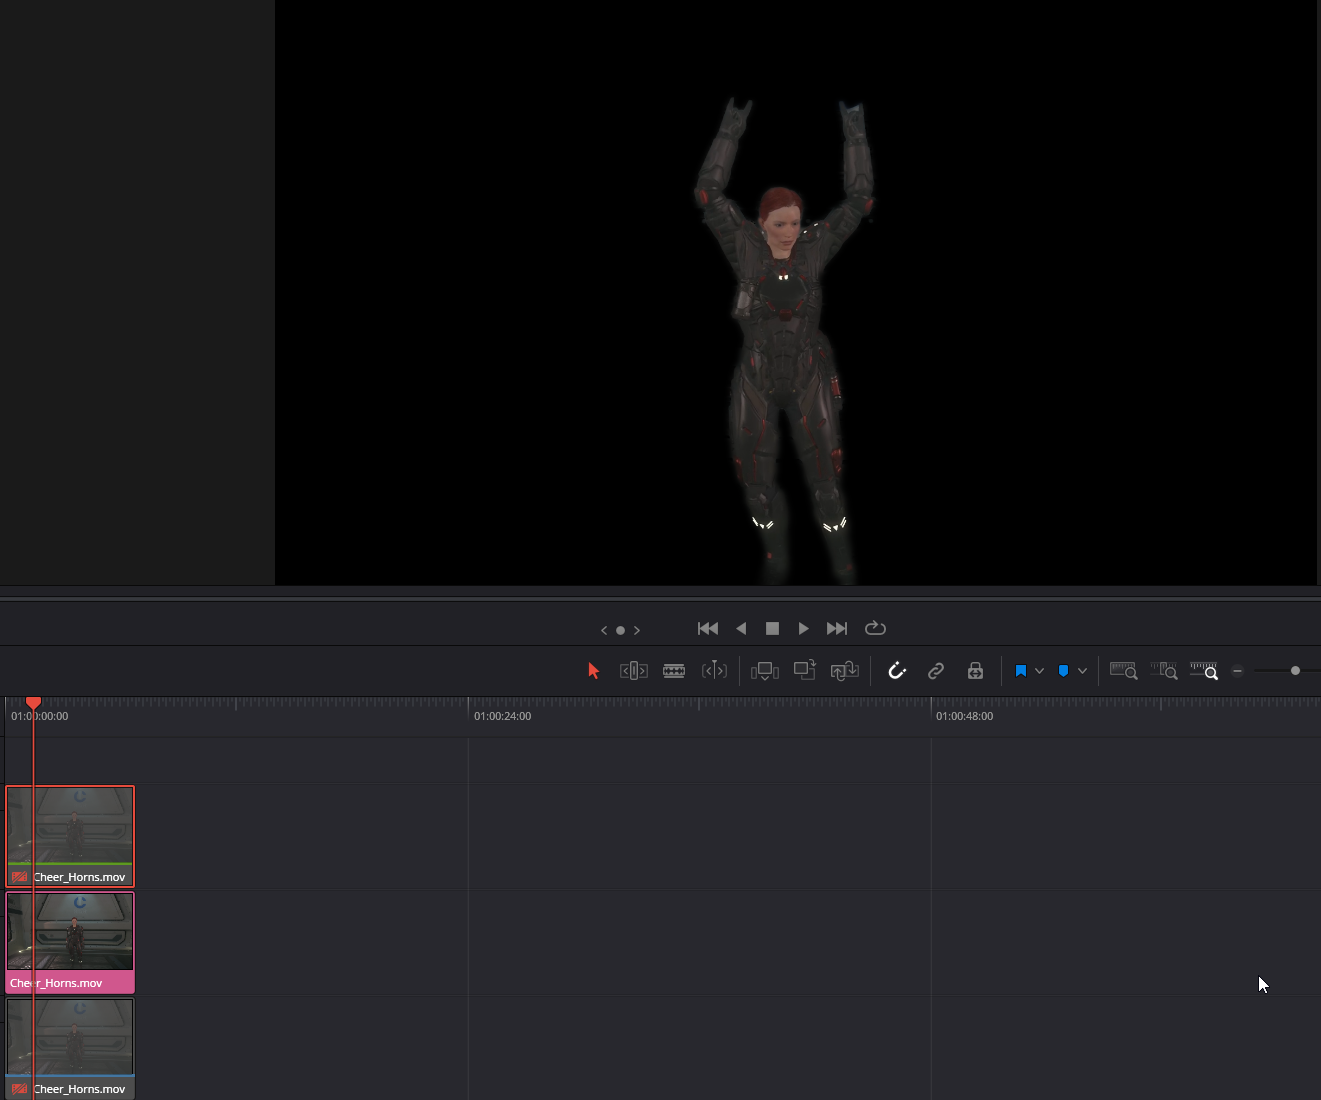
The foreground and background tracks have been disabled in this image, leaving just the subject. The black background is technically the alpha.
Subject over text
As a test, I re-enabled the foreground and background tracks. I then slipped a new track in between the mask and the background clip. I placed a title effect on this track.
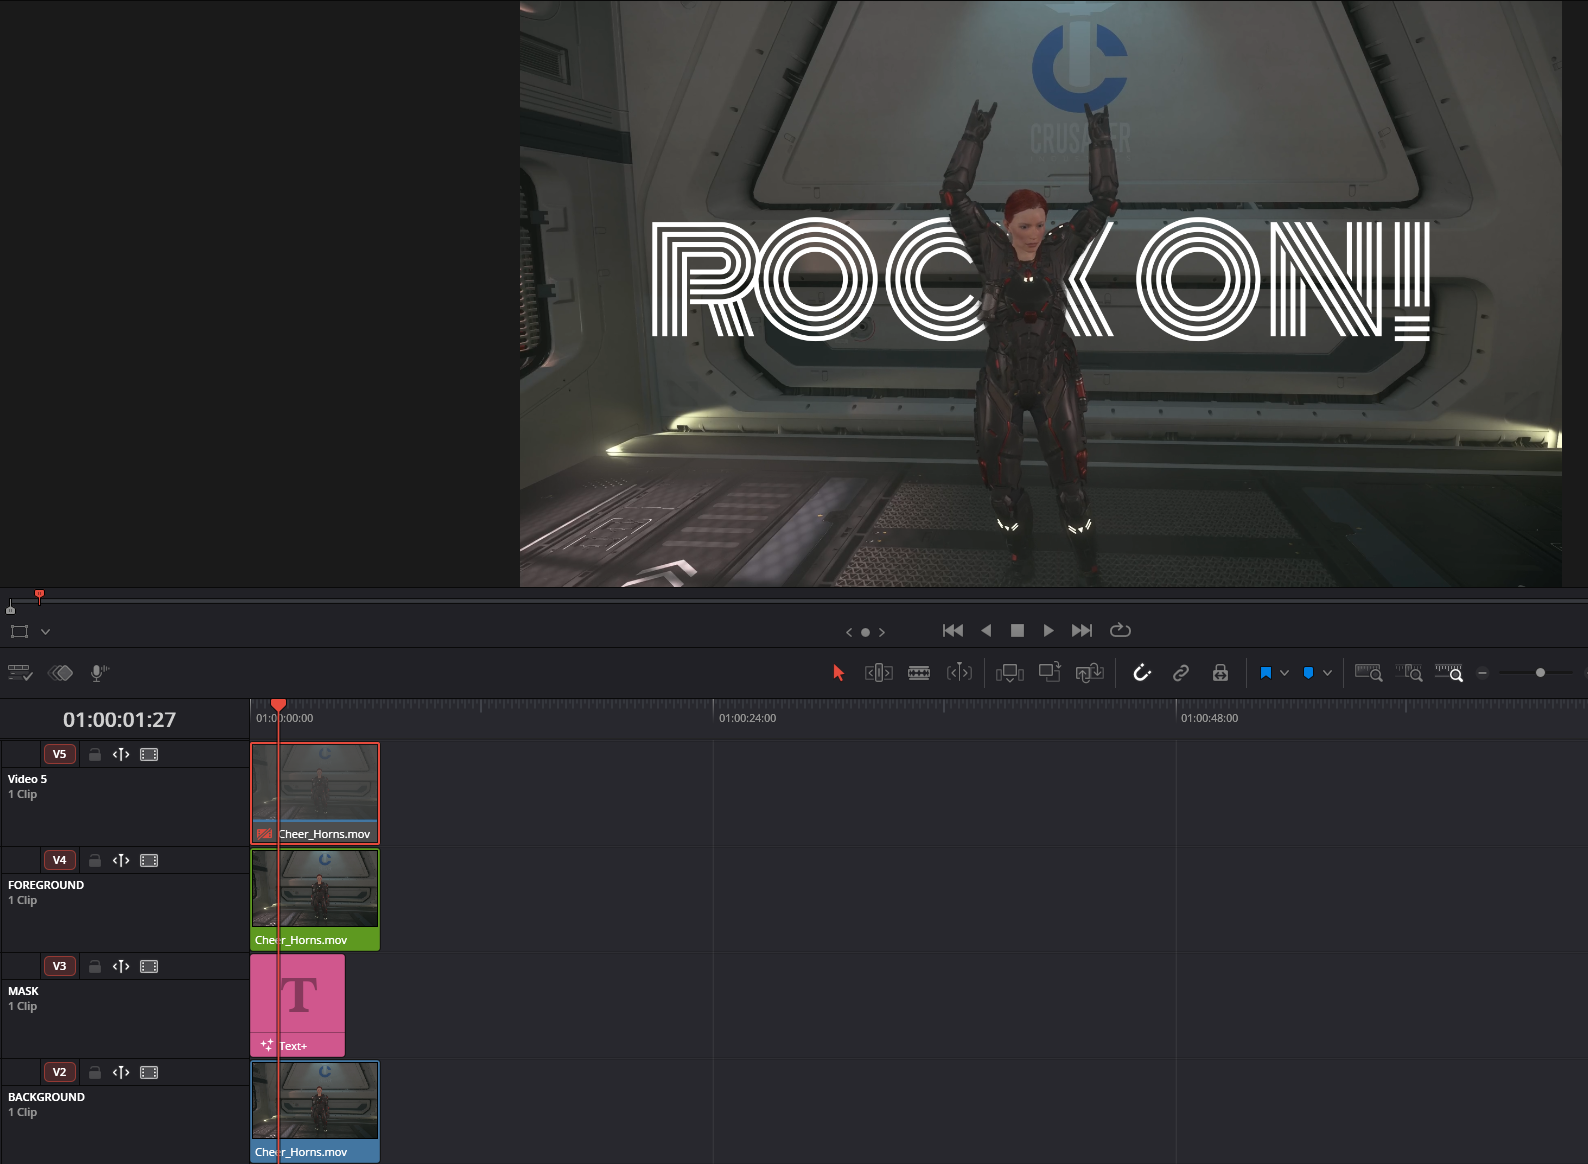
Saving for later
This is the hard part because I have tried it the way I had written it down — which worked — only to have it not work per the way I had documented it. In the end, the following method worked, even though it’s not how I learned to do it originally.
Once the roto has been completed using Magic Mask and the mask has been refined, return to the EDIT page and right click on the masked clip.
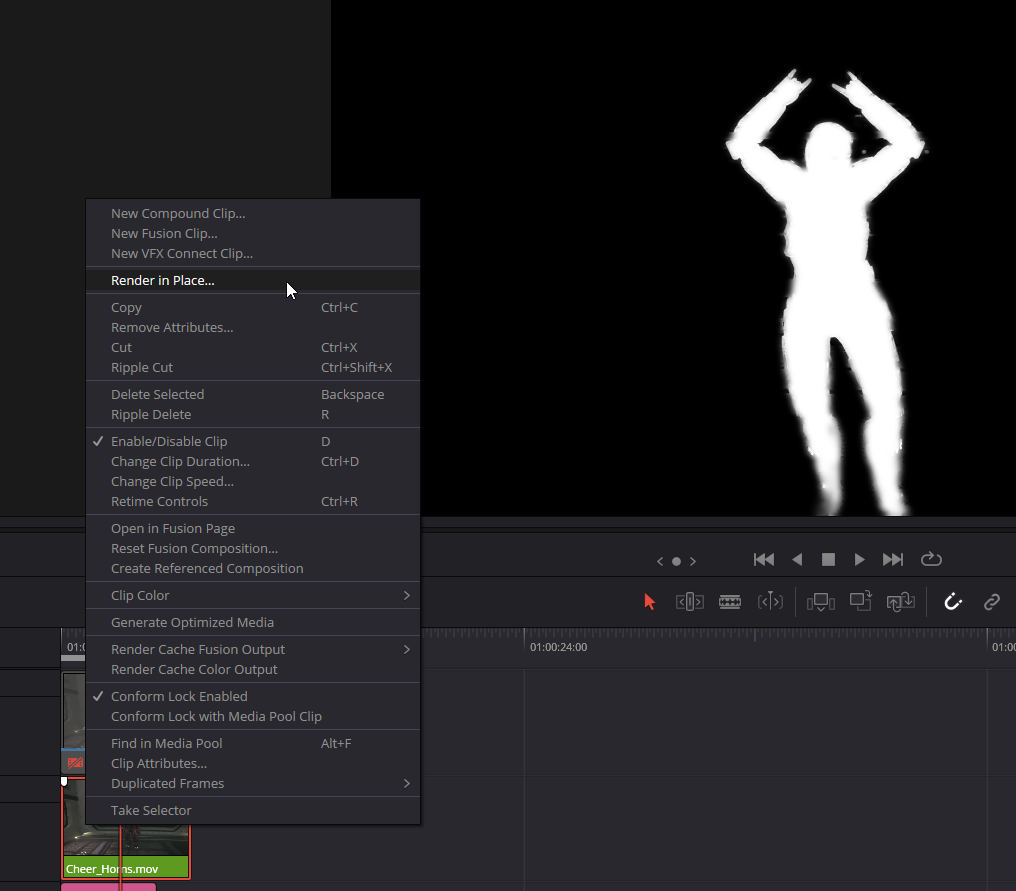
Choose RENDER IN PLACE, give the clip a name which allows for the visual association with the original clip, select the place to save to, and then save the clip. This will replace the original clip with a rendered movie from the hard drive. It’s very important that the roto clip and the original clip be present, the same length, and the same resolution as the mask will be applied to the original clip. Changing the aspect ratio, resolution, or duration of the clip, or even translating the mask or the clip after the mask has been set, will completely screw up the entire thing.
Now, rendering in place might cause an issue where we lose the ability to mask the original clip. When looking at the now-rendered clip in the timeline, it might always appear as a white subject with black background. If this is the case, click on the rendered clip in the media pool panel and choose CHANGE ALPHA MODE. Select “Premultiplied”.
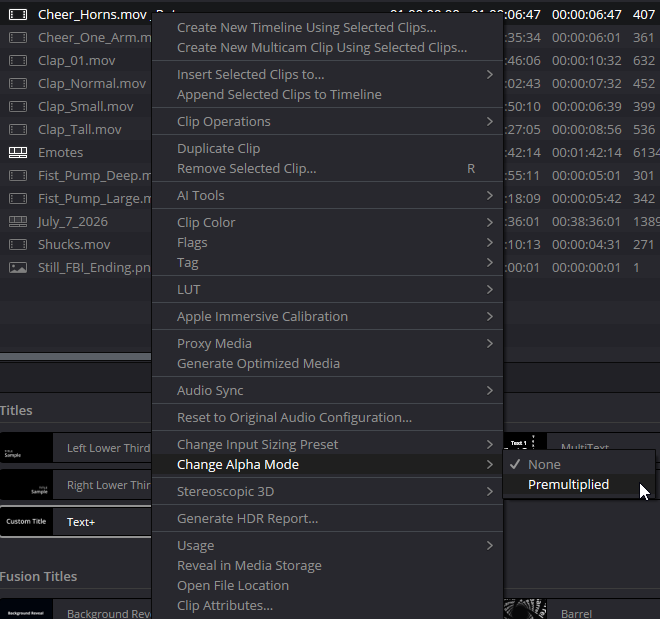
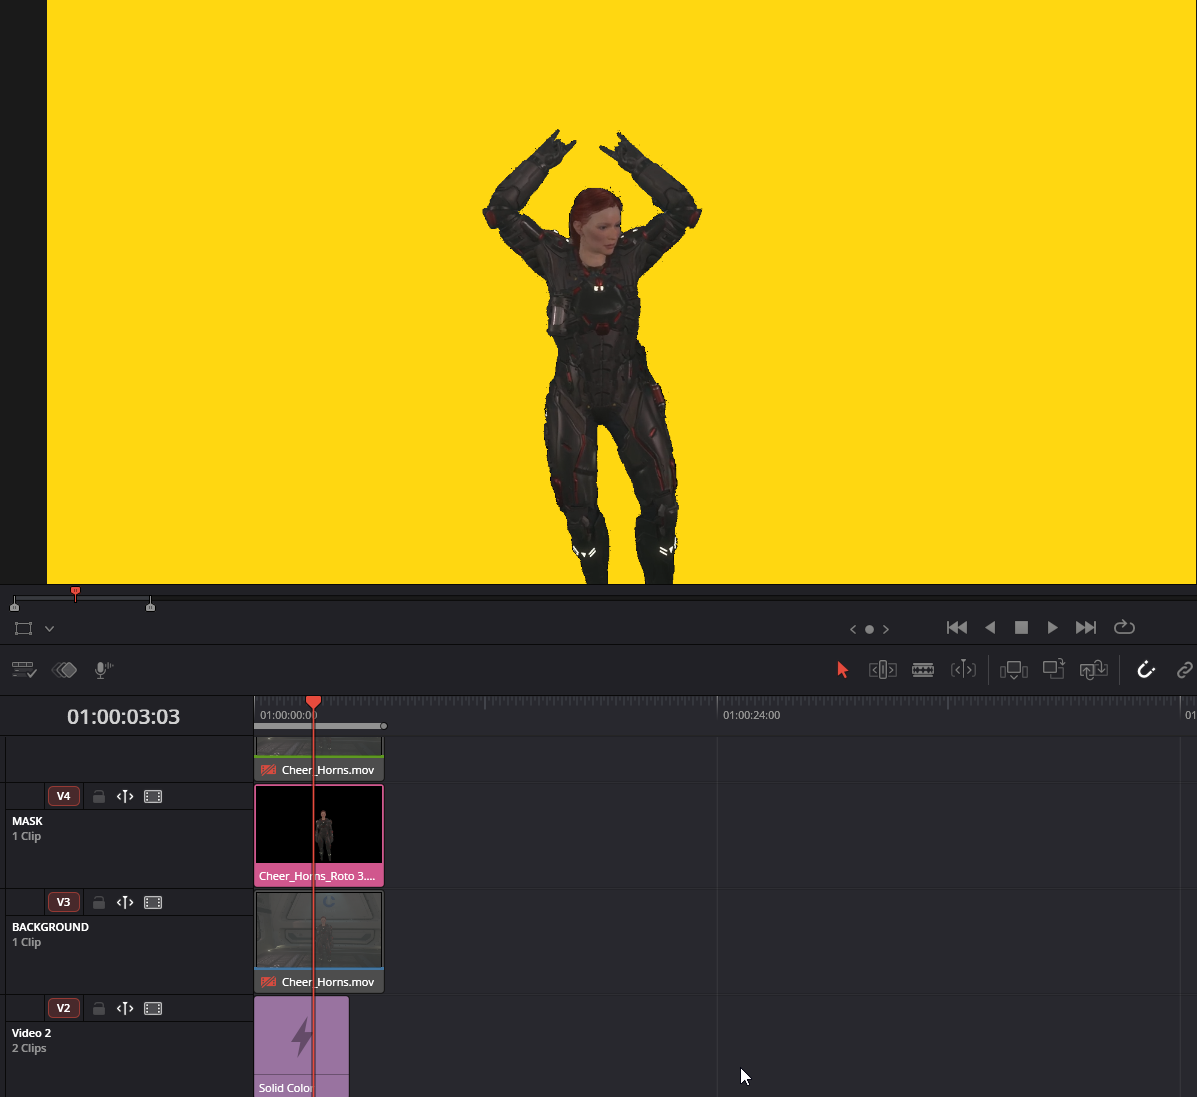
This should allow for the rendered clip to be used as an overlay.
This is just an example, and I kind of rushed it. There are some noticeable issues, specifically that the mask really sucks. I don’t blame Resolve or Magic Mask; it’s the subject that’s the problem. I think the contrast between the subject and the background aren’t enough to help Magic Mask find the edges of the subject correctly. I am going to try to find an in-game location where I can get an even stronger contrast. Also, video game subjects might not be the best subjects, as there’s a lot of graphics processing that fudges things in the name of making them look good while playing. When Resolve has to track the subject, these processing tricks might prevent Magic Mask from defining edges as well as I’d like and require it to. I might be able to install Reshade and see if there’s any way to really sharpen the edges if I can’t get better results with a higher contrast background.