I’m jumping the gun a bit here by talking about the output of a terrain generator package called World Creator without explaining what World Creator does, but I wanted to put this out into the world first, and maybe then circle back at a later time to answer the question “[requisite record scratch] You’re probably wondering how I got here…”
Part of World Creator’s pipeline includes a bridge to popular 3D software like Maya and Blender. Since I am a hobbyist and can’t afford Maya, I use Blender and after messing around with World Creator I exported my first design to Blender using this bridge software. The purpose of this bridge is to cut down on the manual export I’d have to do to get my design from WC to glow it up in another app; plus I’m interested in composition within Blender so there’s also that. Thing is, I wasn’t super thrilled with the results of an earlier Blender render, so I set up an unscientific experiment.
The Test
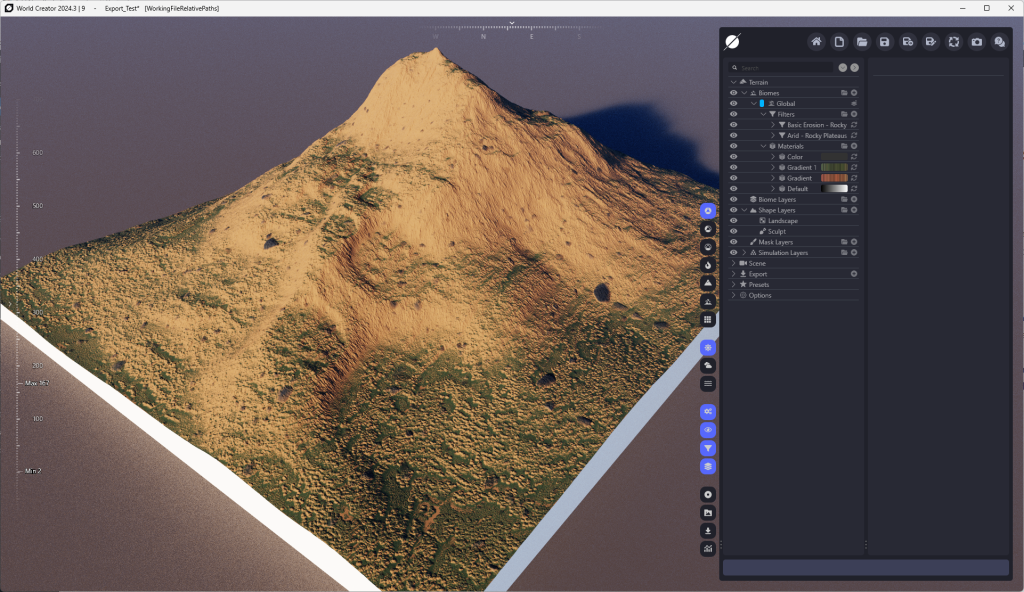
Here’s a basic mountain in World Creator. It’s got a sandstone gradient applied, with a green vegetation gradient on top of that. There’s some erosion and debris added for oomph, but nothing wacky. I wanted to get some detail in there, but wasn’t going to spend hours nit-picking the placement of boulders and such. The plate is only 512×512 in both pixels and representative meters. When displayed in the view port, the resolution is set to 1/8th, so the details are actually displayed at 4k resolution. At this distance, it doesn’t look too shabby, but I can’t really work with it beyond just admiring the landscape within World Creator.
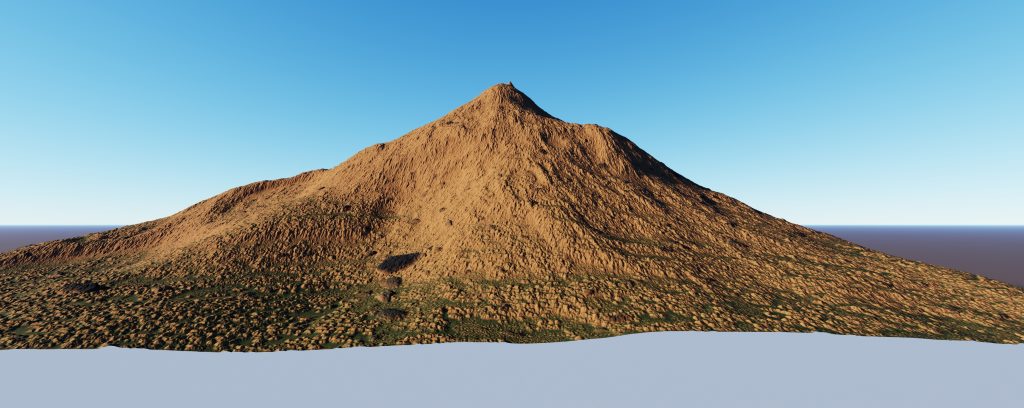
Here’s a screenshot of a specific vantage point, taken from within World Creator. It’s only using the default lighting which is more complicated than I can explain and it doesn’t really mean much in this experiment anyway. This is our control, more or less, but shouldn’t be considered to be “the gold standard” or anything. It just represents what we’re aiming for once we get over into Blender.
Method One – Sync
For the first approach, I used WC’s built in “Sync to Blender” bridge. For this I had to open Blender to a new, empty scene, press the “Sync” button in WC, then press the “Syncronize” button provided by the WC plugin. This generated a plane in Blender which was subdivided X number of times — I don’t know how many times since that’s only accessible at the time the mesh is created and I’m not about to count tiny squares. The mesh then has two modifiers: A displacement modifier for generating the shape from a height map, and a subdivision surface modifier to subdivide the mesh further. The more subdivisions a mesh has, the better the texturing. The sync import also automatically set up the shaders for this so I didn’t have to mess with that.
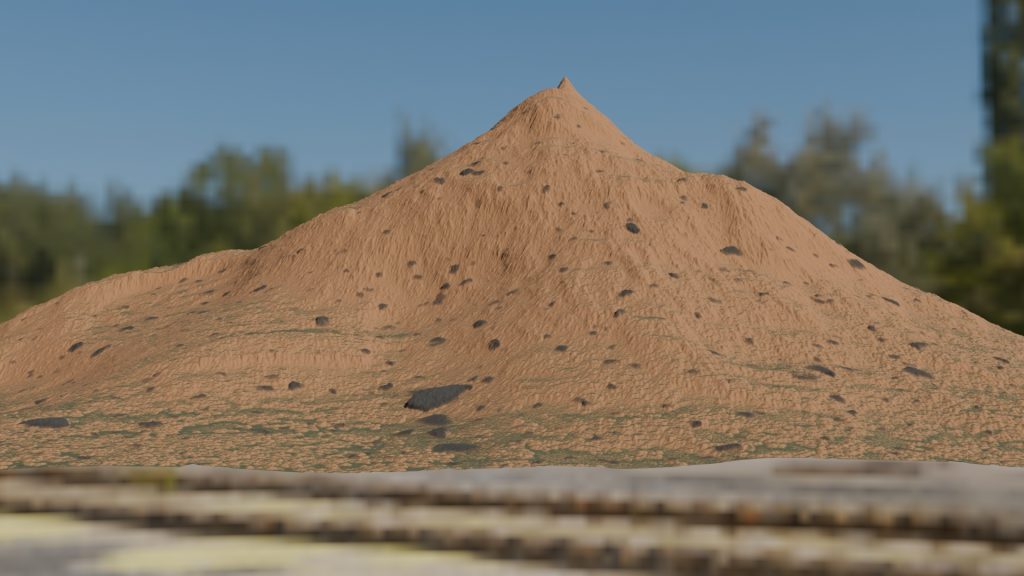
I added a daytime HDRI from PolyHaven to provide basic scene lighting so I didn’t have to worry about positioning multiple lights for two different meshes in the same scene. Here’s a render from Blender of the synchronized version of the above terrain:
Method Two – Manual
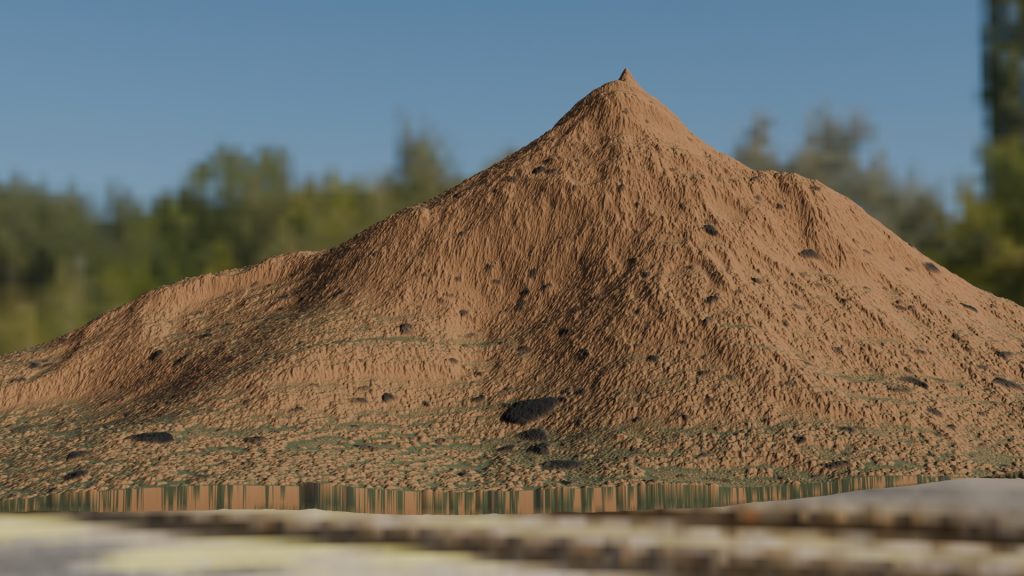
While writing this post, I went back and looked at how the sync version imported the terrain, and to be frank, it’s no different from how I did it manually. I created a plane, sized it to 512×512 and subdivided it 80 times. This resulted in slightly larger squares than the sync version had without the sub-D modifier, so I think the sync version subdivides the initial plane more than 80 times (maybe 81 – 85). I then added the sub-D and displacement modifiers to my manual plane, set up the height map (with some rekajiggering to get the height correct, though I probably could have looked at the sync version’s displacement height to get the exact same value…I was only off by about 6 units with a guess), and used Node Wrangler to apply the exported images in the shader editor. With the same HDRI and only a lateral movement of the camera to frame the shot, here’s the “manual” render (same render settings).
Analysis
To me, the manual build seems to have more detail. The shadows are more obvious, which gives features more depth; the debris in the foreground is especially telling as there are shadows cast on the left side of each pebble, whereas in the sync’d version there are no shadows in the same place at all. Even on the mountain itself, the manual version has shade on the left slope while the sync’d version has none.
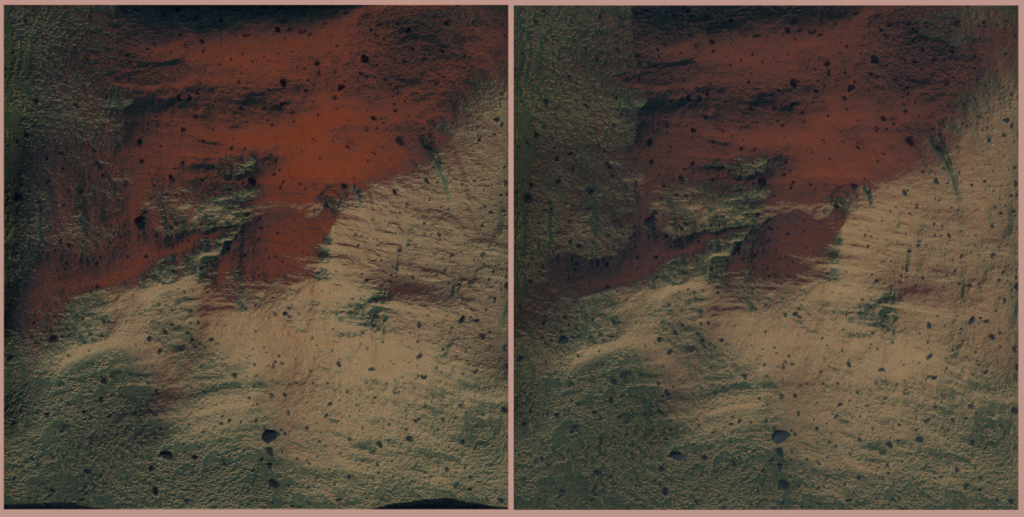
If we look at the textured meshes from the top, the manual version (on the left) seems to have a more stark and contrasting coloration in the reddish areas than the sync’d version (on the right). A small outcropping near the right-hand-side center line also seems more defined in the manual version than the sync’d version. Plus, ridges inherent in the terrain are more pronounced in the manual than in the sync’d.

In this shot within the Modeling tab, I removed all world lighting and gave each terrain it’s own Area light. Both were set to Z-position of 200m, a strength of 10,000, and a size of 1m x 1m. I also added a vertical plane between the two models to prevent light-bleed from the other lighting source. Again the model on the left is the manual, and shows definitive differences in shading detail while the sync’d version is more uniform with fewer shadows.
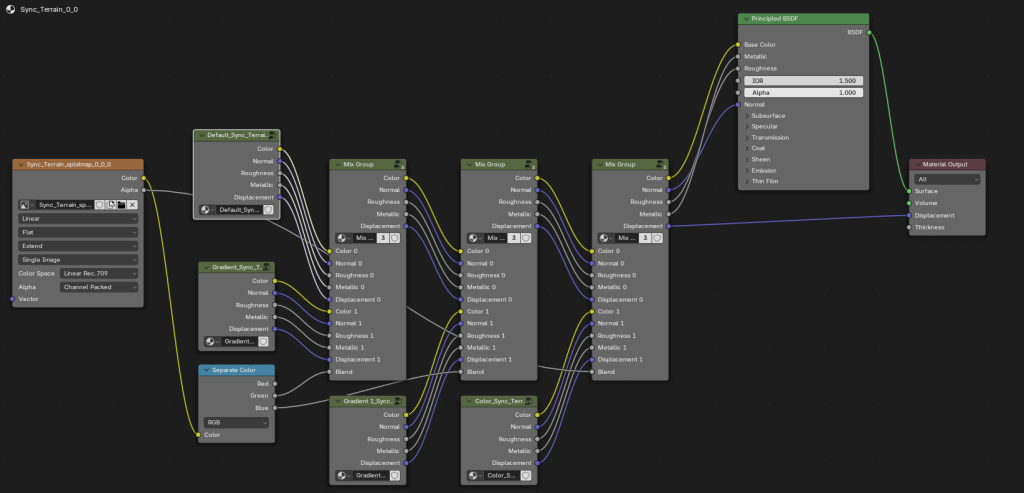
This is the shader layout provided by the sync operation. Dissecting this (since I don’t think there’s actual documentation on WC’s Blender bridge and how it generates output), it looks like World Creator exports a splat map which I had to look up: it is a multi-layered image that relies on alpha channels to identify different textures from a single image. This whole octopus of nodes is essentially breaking out several different textures from the splat map and is applying them to the Principled BSDF at the end.
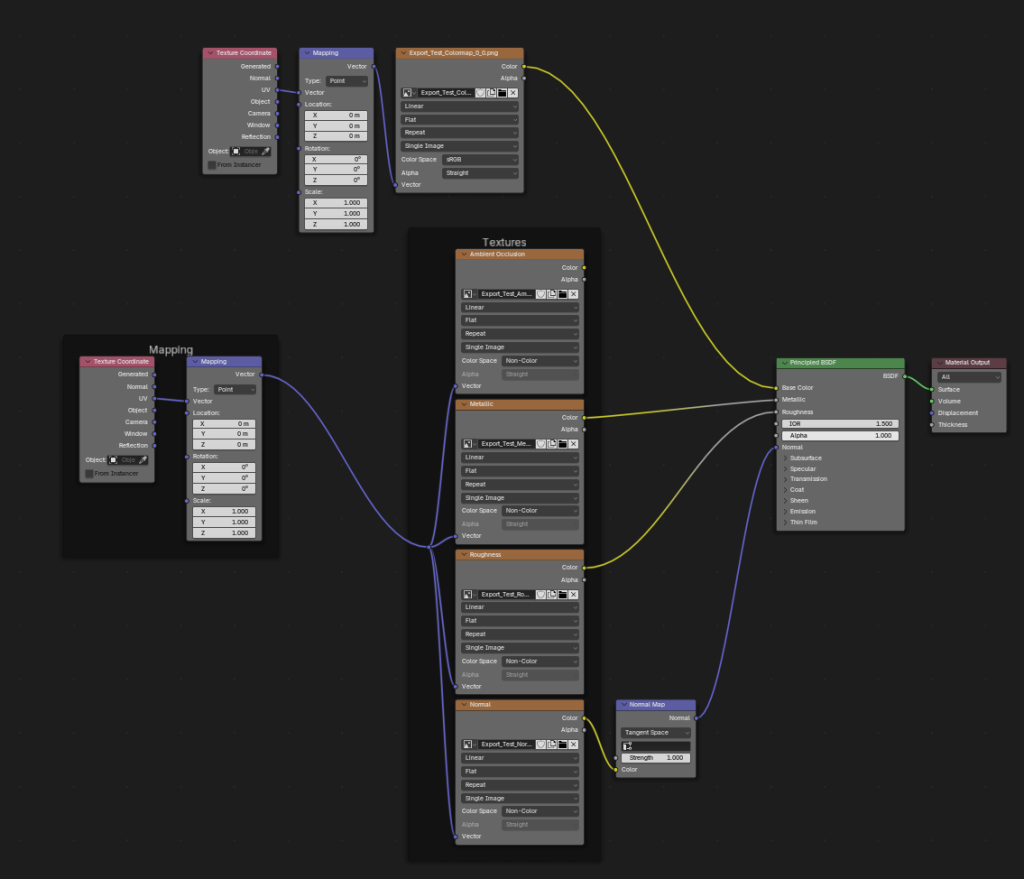
Here’s the shader for the manual result. In order to get this, I had to set up an export plan in World Creator where I designated the images it should generate. I chose metalness, roughness, AO, normal, color, and height, even though images such as metalness don’t really need to be a part of this render. I used Node Wrangler to import the AO, metallic, roughness, and normal, and manually added the color map. As stated, the height map was used with the displacement modifier and is not represented here.
Conclusions…?
While the sync method is quicker and easier to perform, I’m thinking that exerting control over the exported parts of a Blender project is the better option.
Unfortunately, I can’t tease out the splat map — when I open the file named “splatmap” in Affinity Photo, I get what looks to be the layout of the debris rocks, but nothing else. Still, it’s the only input for the sync’d version in the shader editor, so I can only assume it’s doing some voodoo to split out the different parts of the texture.
What I think gives the manual version the edge — literally — is the fact that I opted to export an ambient occlusion map. AO defines the nooks and crannies of a model and that data can be used by a renderer to determine where the shadows go.
Now, what I might be missing is all of the post-processing which goes into making a decent render, and I will admit that my skill set isn’t quite at a point where I feel I can do that justice. The sync’d version might be “basic” as a means to an end: allowing the artist to light the scene without any pre-provided baggage. On the other hand, if a mapping such as AO exists, then why not use it? Post-processing can only enhance the work from a starting point.
I guess that means from now on I’ll be exporting manually from World Creator. At some point, though, I should probably cover my bases and work on a proper scene lighting setup so I can test both the manual and the sync’d versions in Blender.

