Scopique
This was one of my most favorite projects in After Effects because it was unique and required a good amount of work both in Guild Wars 2 and in After Effects, so I am extremely happy that I was able to get a version working in Resolve.
Once again, I’m thankful that I have all of my original source files on my server. The key element of this project is a video of my GW2 main, Keliel Olivar, standing in front of a green screen. I did this with a visual add on, ReShade, which had settings that allowed me to basically creep a chroma key background forward until it was right behind the character. I’m sure instructions are out there somewhere today, but I couldn’t recreate it if my life depended on it.
The Resolve version took quite a lot of trial and error — mostly error — and uses several techniques that I am certain are not optimal, but in the end, the result is the important thing, right?
The character
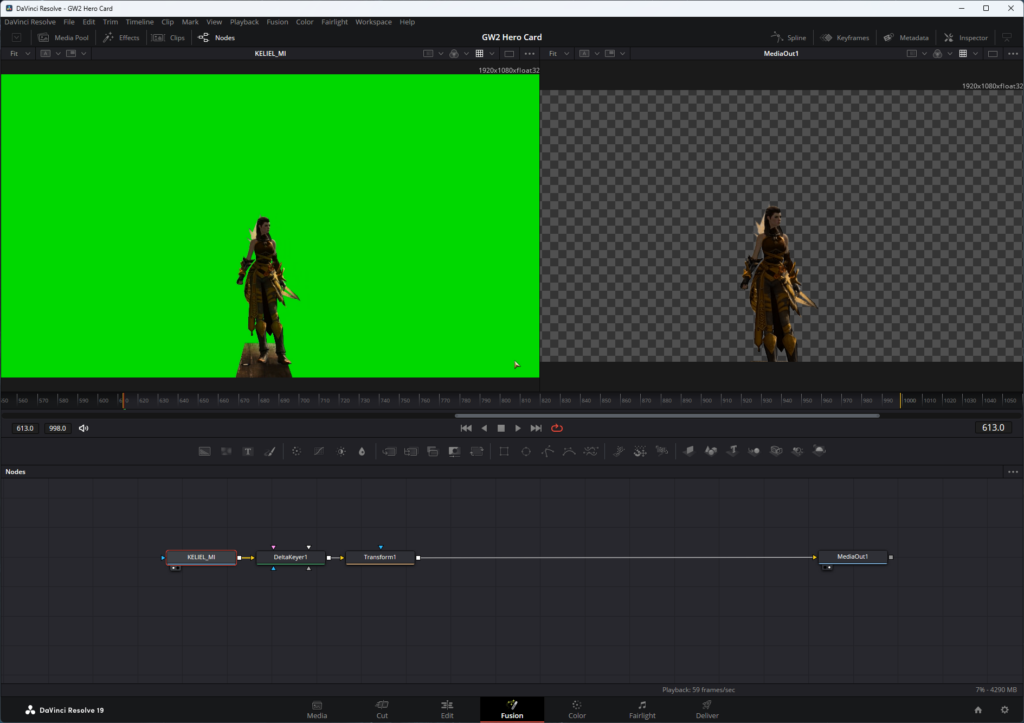
This was fairly easy because, as I mentioned, I had the original video. The first step was to remove the green with a Delta Keyer.
I still have the same problem that I did in the original AE comp: the character is standing on a board that I didn’t want to be there. In order to take the recording with the green screen I remember having to stand on the diving board outside of Lion’s Arch because that was the only place I could find a background that would work with ReShade.
Originally I tried to use a polygon mask to remove the boards, and I did get it to work, but I forgot that the character changes stance over time, so I would have to have animated that mask and it was becoming a massive pain. In the end, I did what I did the first time: moved the character down so the board was out of frame.
The transition
This track was the one that took me the most time.
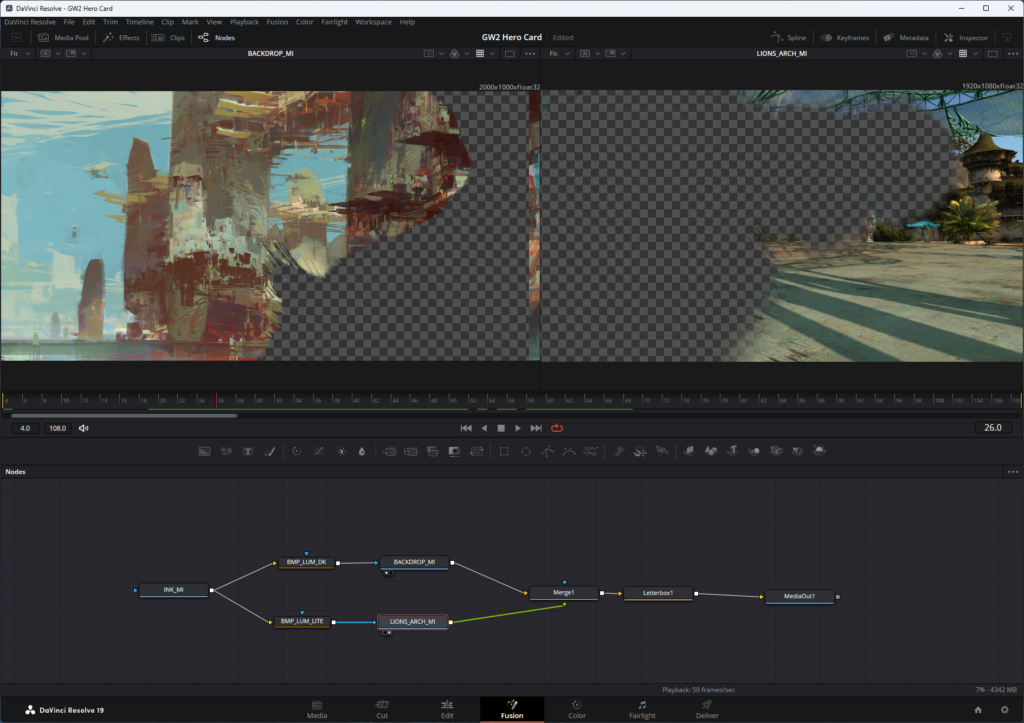
I have a small library of video clips that I had downloaded back in the AE days, including a series of “ink in water” renders. These are short videos of ink spreading across water, filmed from above and on top of a bright white light, resulting in a black and white clip.
The goal is to use this to reveal a still image from GW2 in the GW2 fashion. If you’ve played the game then you’ll remember the transition into conversations that occur in the original release; they look very much like ink spreading in water, and acting as a transition between the game world and the conversation panel.
This started with the ink video. From there, I added two Bitmap Mask nodes. Because black and white images or videos only display what’s in the white portion (“white reveals, black conceals”) when used as a mask, I set one bitmap mask to Invert; this resulted in the left side starting with white and moving towards black and the right side starting with black and moving towards white. The result is that the “new” image looks like it’s wiping over the “old” image.
The text
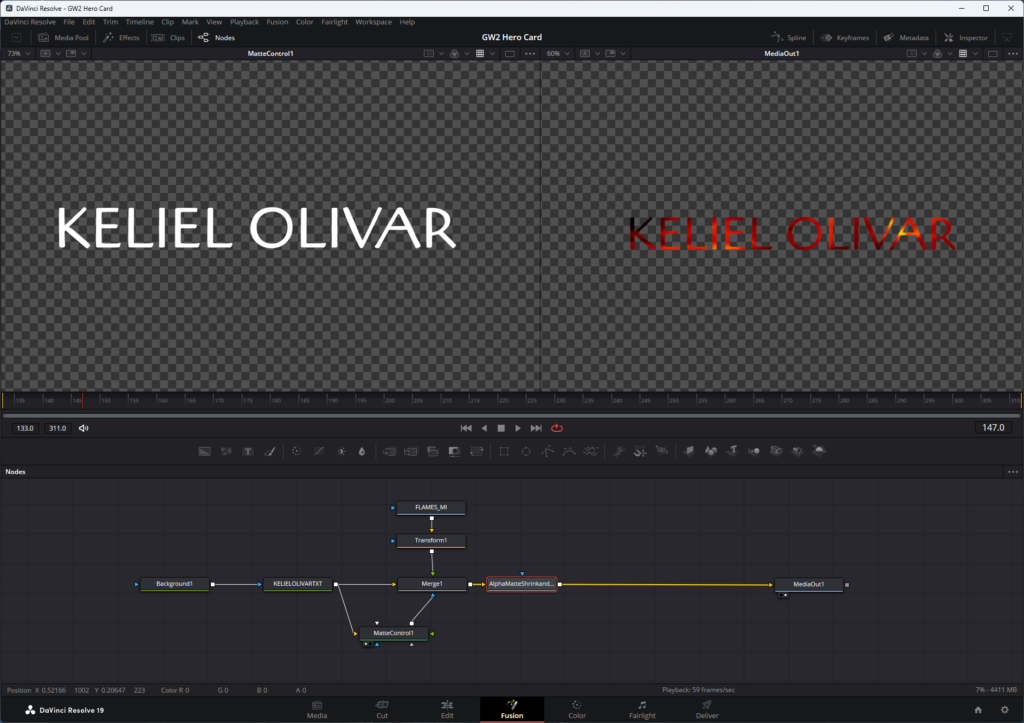
There’s two text effects. The first uses a plain white font — sadly, not the official GW2 font which is copyright, but one which ANet actually suggests as an alternative.
It starts off merging with a still image of flames on a black background on which I placed a Transform node so I could move it around and size it. The merge layer’s blend mode is set to Multiply which, once again, shows the background through the white portion — the text — providing a nice flame-filled font.
One issue though: using the transform on the flames and merging it with the font resulted in the flaming font on a black background. To get around this, I added a Matte Control node, set the font as the input, and plugged the matte’s output into the mask port on the merge node. This resulted in a fiery font with an alpha background. I also added an Alpha Matte Shrink and Grow node to shrink the area around the font because there was a bit of an outline that made the font look weird on the master comp.

The “Ranger” text was simple on paper but took me a while since I wasn’t paying attention. It’s just yellow text on a Background node with a Transform applied. I had to do this as a Fusion comp because I needed access to the spline editor to control the speed of the transition. The font starts close to the camera and off to the right, and over 60 frames, zooms in and to the left to where it displays on the top of the comp. I screwed up the keyframing more than a few times.
The character freeze
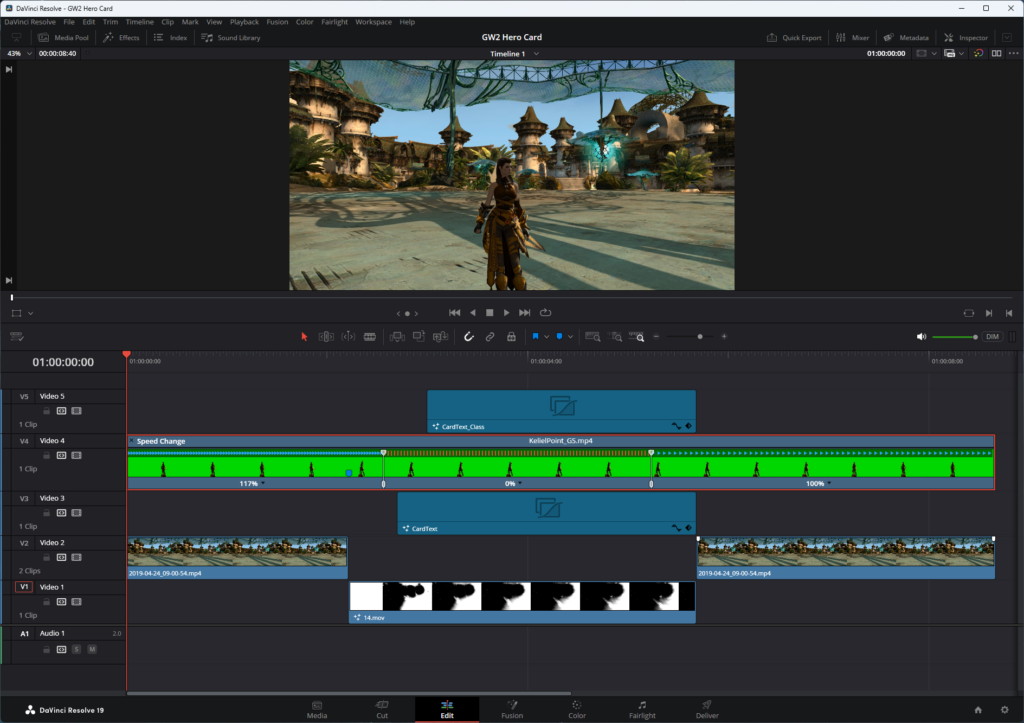
Back in the main comp, I scrubbed to the point in the character animation where I wanted the animation to freeze. At that point I right clicked on the clip and chose Retime Controls. This put the timeline in the mode you see above. A keyframe was added at the start point, and I dragged an end keyframe out to the point where I wanted the freeze-frame to end. The result is an animation that plays, then freezes for a few frames, and then resumes animation.