Scopique
Here’s another one of those deviation posts to keep you on your toes.
I’ve written about making videos and the difficulty I’ve had with audio. Seeing as how I’m back at the video creation game, I recently posted about how I had been looking at new microphones for my setup. I’ve also posted about some solutions I have found within OBS that I have used to make my audio sound better. Because of all of the approaches I have tried and implements, I’ve tangled myself up in a confusing mass of cables, buttons, and settings that provide me with what I feel I need to have available in order to support the way I use my PC audio for both for gaming and for other tasks. In some cases, my solutions support both video recording and everyday use; in other cases, I have found that I’ve only made life harder for myself.
While looking at microphones, I learned about Elgato Wave Link which I swear I had written about before, but I couldn’t find the reference in my post list, so I’m going to write like I’ve never mentioned it before. Maybe I have, but the app is now at a 3.0 version so it might just be a whole new experience.
What’s the Problem
Windows doesn’t have very robust, native audio routing, and I suppose that makes sense; I doubt the majority of users have an everyday need for more than one audio output. Instead, it’s left up to the app developer that if their product should route anywhere other than the Windows Default Audio Output, that feature can be built into the app’s settings. Discord does this. World of Warcraft and Guild Wars 2 do this.
The problem is when I need a non-hardware system to pick up the output. Differentiating between my sound bar and my headphones for me is easy. Getting OBS to make the same distinction is hard. As an example, I can set WoW to send audio to my headphones, and I can set Discord to do the same, but I can’t split WoW from Discord into their own channels, so OBS can only pick up a combined audio signal. In order to get the two apps into their own channels within OBS, I need a third party app like Virtual Audio Cables (VAC).
Virtual Audio Solutions
VAC and apps like it create virtual inputs and outputs which would allow me to send WoW’s audio through to output channel A and Discord’s audio through to output channel B. I can then add two inputs to OBS’s audio stream, one which listens to VAC’s channel A, and one which listens to VAC’s channel B. Now I have two audio tracks within OBS, can control each volume individually, and can send each channel out as it’s own track when recording.
Why? Most of the time it doesn’t matter much. At most, I’m recording the game audio and my mic. I want to omit the system sounds, if any, or maybe keep background music out of the video. When I am playing with friends and want to include the Discord audio is when this setup comes into focus, as there will almost always be times when I need to mute chat during record or cut out noise from someone else’s side in post. Having Discord be sequestered in it’s own audio input within OBS is an absolute priority for me when including it during recording.
Elgato Wave Link
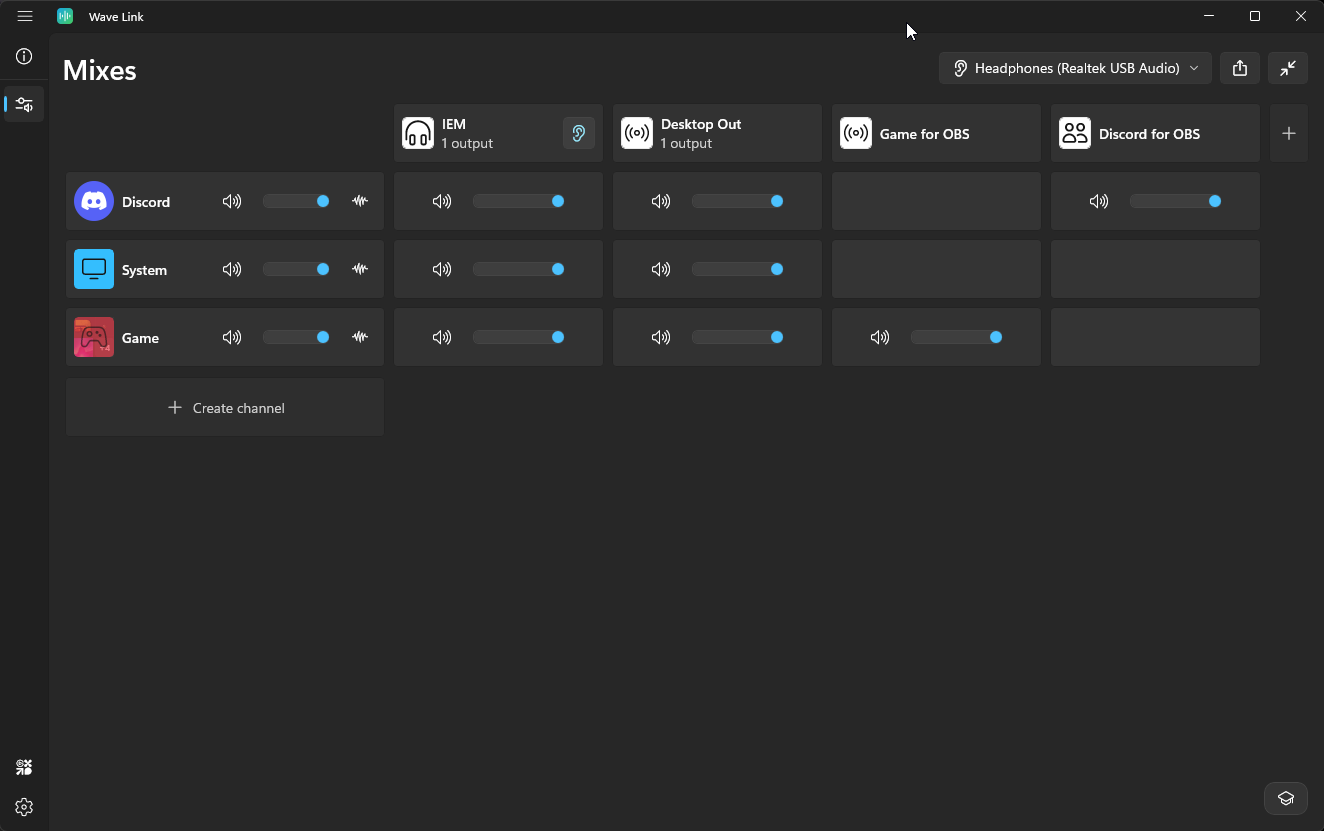
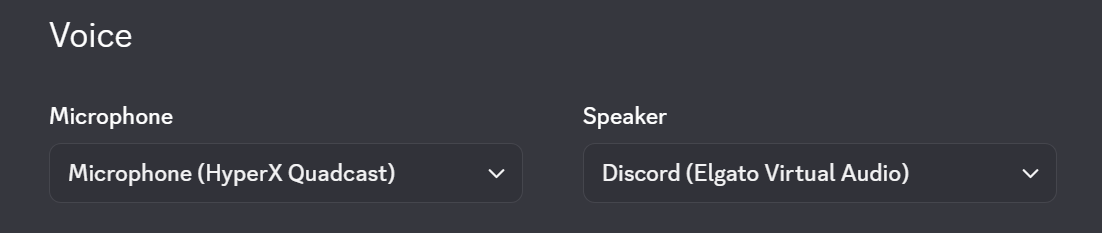
Wave Link is a free app available from Elgato’s website. The gist is that I have set up audio sources as rows, and audio outputs as columns. In the screenshot above, I have Discord, System, and Game as audio inputs. Defining an audio input is entirely under my control; I can make as many of them as I need. After making a Discord input, I used Discord’s “Voice & Video” settings within the app to use the newly available “Discord (Elgato Virtual Audio)” option for it’s output.
Once I had all of my audio inputs defined, I could then set up output routing. Wave Link can define up to five different output routes, and each route can contain as many or as few of the defined audio sources as needed. In my case, I had four defined: IEM for listening through the earbuds, Desktop Out for my soundbar, Game for OBS to handle game audio when recording, and Discord for OBS to handle Discord audio when recording.
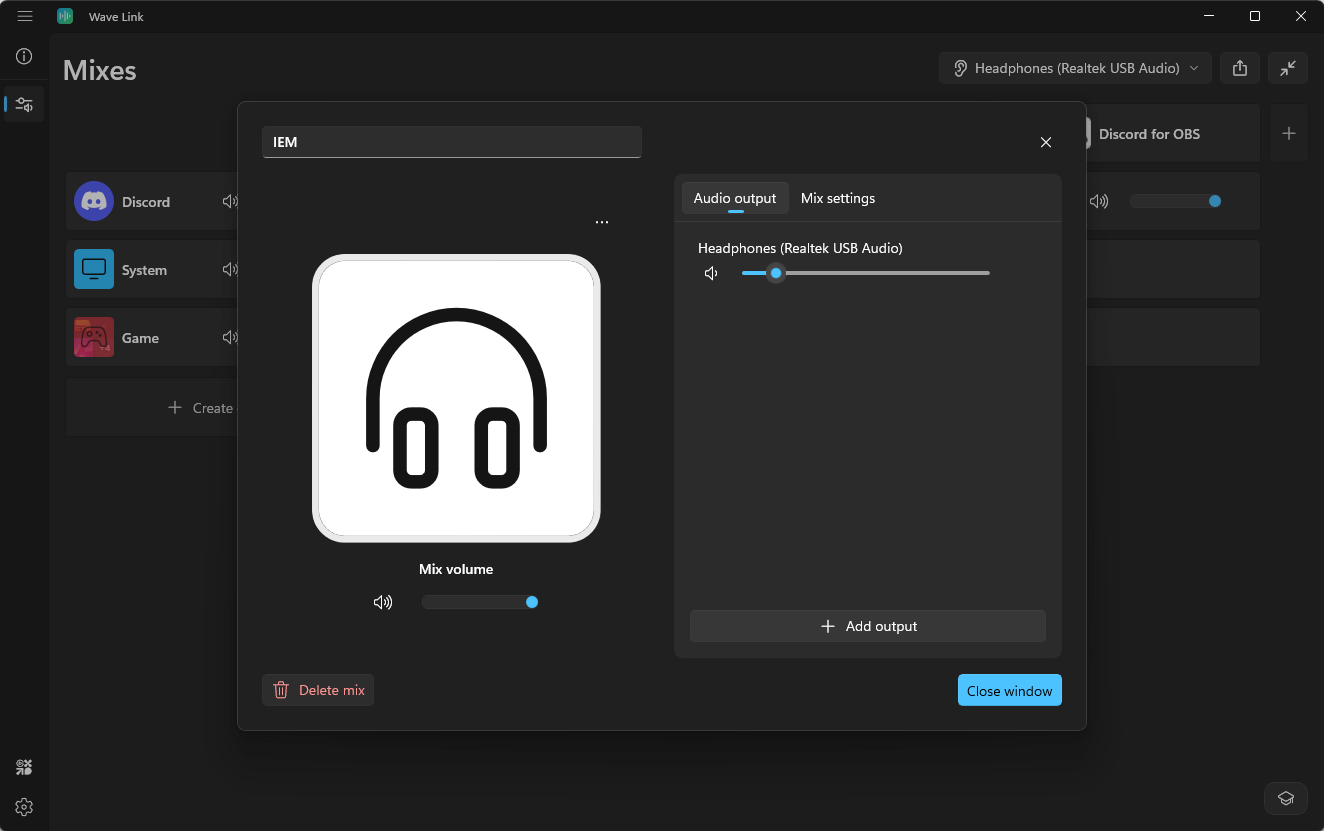
Each audio out can be set to send to a specific known hardware output. In my case, I have three available: the Desktop output, the IEM output, and my Razer Blackshark headset. I opted to create one output per device that I use (the Blackshark has been “retired” as the IEMs sound better and are more comfortable).
Then, it’s merely a matter of adding a panel to the intersection between the audio in and the audio out. My setup allows me to hear all audio through both the IEM and Desktop outputs at all times. Since I want the game audio and Discord audio to be available as separate channels in OBS, I’ve given each of those inputs their own dedicated output channel as well.
OBS
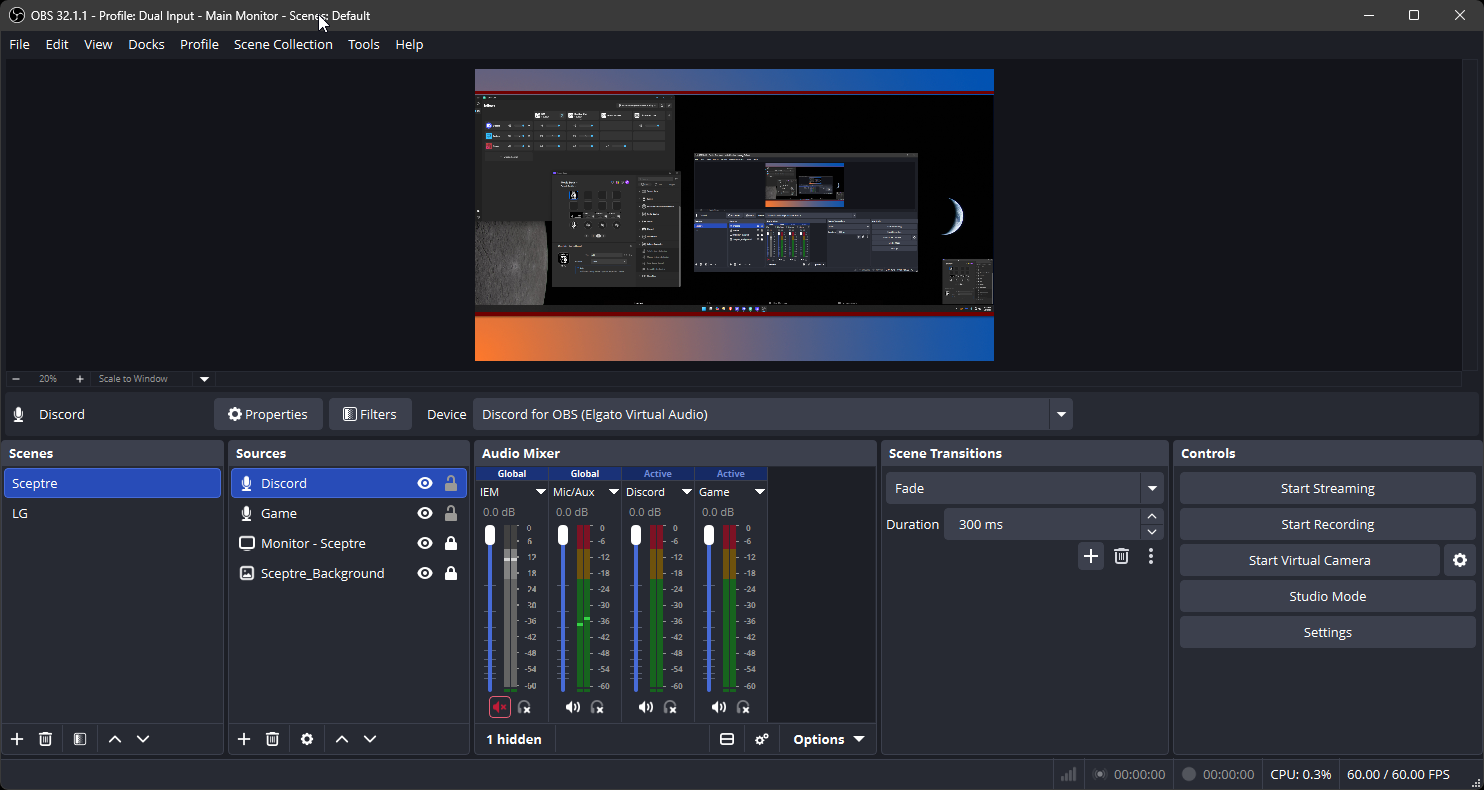
If you’re familiar with setting up audio inputs in OBS, then you might already understand what needs to happen. I’ve added the two dedicated audio outputs from Wave Link into OBS. The Discord channel uses the “Discord (Elgato Virtual Audio)” as it’s source, and the Game channel uses the “Game (Elgato Virtual Audio)” as it’s source.
The one curveball is that, while Wave Link allows for the addition of a mic as an input, I don’t use it. The reason Wave Link includes it, I think, is so that the broadcaster/recorder can monitor the mic’s input. For me, hearing my voice in my own ears a millisecond after I speak is disorienting, but if that’s your thing then Wave Link can add any mic as an input. I have assigned the mic as the native inputs within Discord and OBS, since the mic is dedicated to those apps whenever I’m using either one. I suppose that if you have VST audio filters that you want to apply to a mic (and Wave Link will read and make available any VSTs you have installed) then adding the mic as an input is what you’ll want to do.
Bonus: Controlling with Stream Deck +
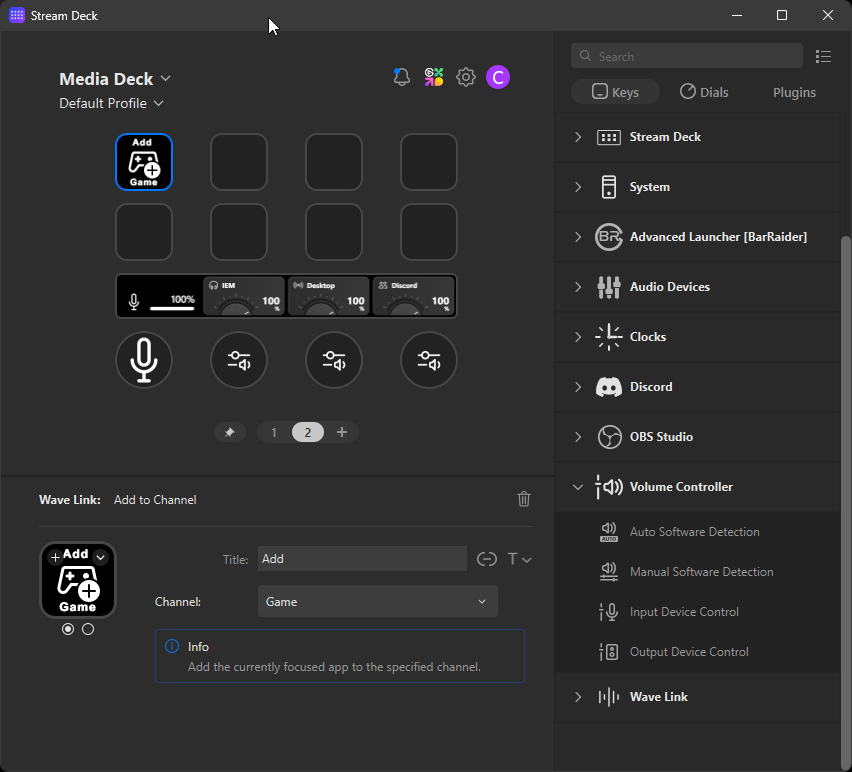
If you have a Stream Deck + (or even a regular Stream Deck, though the dials on the Plus are going to provide a much better experience) then you can use it as a mixing device to control Wave Link.
In my current, unfinished setup shown above, I have the second, third, and fourth dial controls set to control the IEM, Desktop, and Discord dedicated outputs. The dials on the SD+ have two actions: twist and click. Twisting the knob will control the volume of that output, while clicking the knob will mute that output. This is essential as I want to have a game’s audio piped through the Desktop output when I’m not recording or in Discord voice, but I don’t want it through the soundbar when recording or chatting. I can simply click the knob to mute the Desktop output when I only want audio through the IEMs, or vice versa. I also have a direct mic control assigned to the first knob so I can mute the mic when needed (although I’m considering turning that into a button and assigning the Wave Link’s Game output to a dial).
The only issue I’m having with this setup is that the volumes are currently set at 100%, which doesn’t translate well to the actual volume on my system. I was watching a video this morning with the audio through the Desktop output, and I couldn’t make it any louder as Wave Link now controls the Desktop audio completely. I believe I’m going to need to increase the volume on the soundbar in order to normalize the output so the setting of the VU meter displayed on the SD+ is closer to accurate, and not always reporting at 100% gain when it’s clearly not.
Wave Link Solves the “Multiple Games” Issue
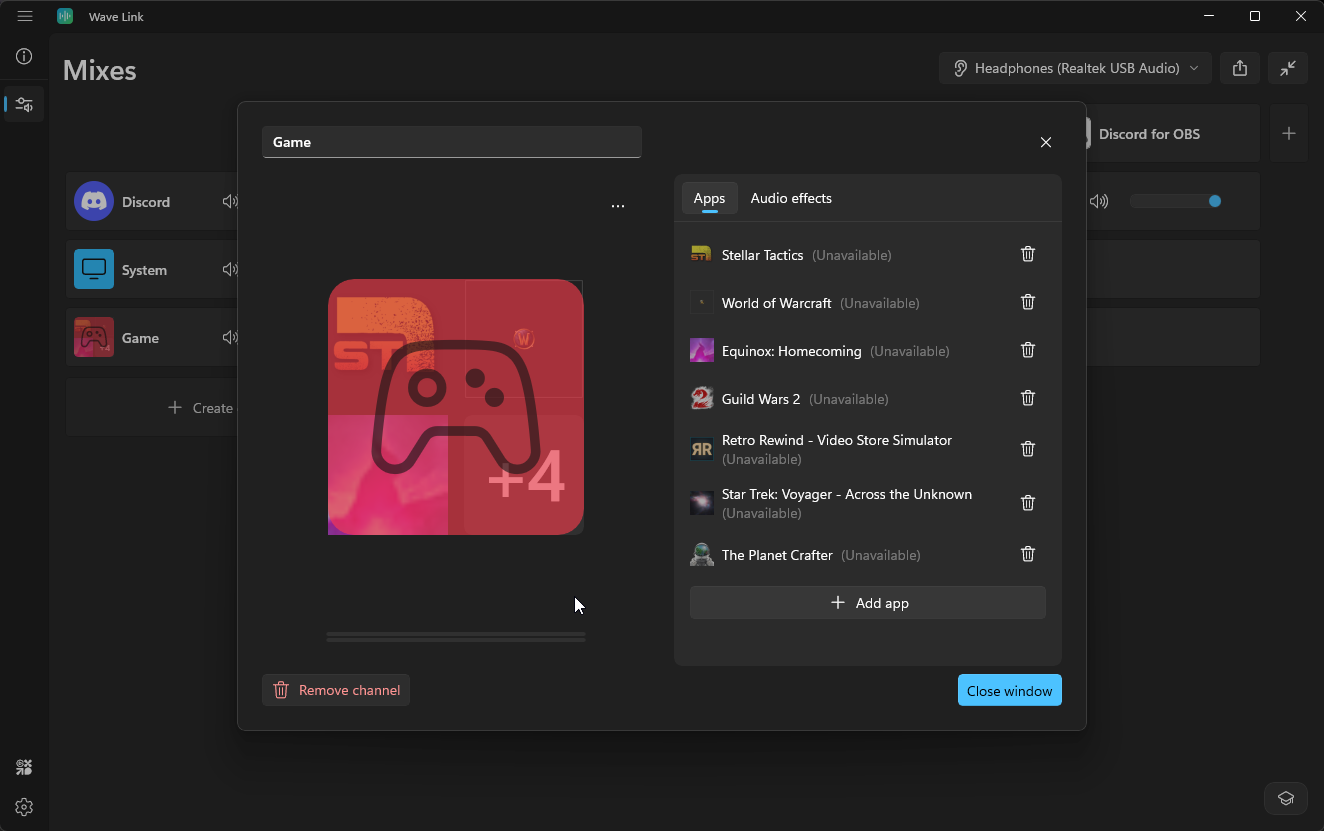
Although OBS has an audio input that can capture an application’s audio output, the big issue with that feature is that I have to add a dedicated input for every single game I might want to record. Right now, it’s only a toss up between continuing my Stellar Tactics series and possibly a session of Star Citizen with @CakedCrusader and @Mindstrike at some point.
Wake Link provides a series of generic inputs that allow for a dynamic allocation of possible inputs. In the screenie above, I’ve used the generic input called “Game”, and have added all of the games that are currently installed. Whenever I fire up any one of those titles, Wave Link should detect it, intercept it, and pipe it through the Game channel.
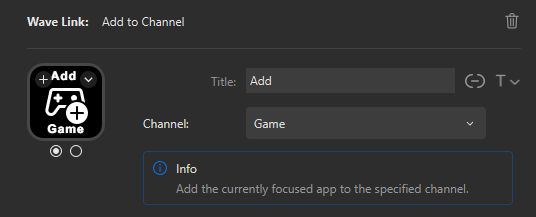
There is one slight issue with this, and that’s the fact that some games aren’t visible to add until they’re running — like Star Citizen, for example. In a praiseworthy move, Elgato has recognized this issue and offers a dedicated “Add Game” button if you’re using a Stream Deck.
If you’re not using a Stream Deck, then you’ll have to Alt-Tab out of the game and attempt to add it to the Game channel manually; I don’t know if the game must have focus to show up in the list of available options when Alt-Tabbed, or if simply having the game running is enough.
After years of trying different options, some with success and others with irritation, Wave Link has been a slam dunk for me. It was a bit confusing to set up at first, so I watched this video from Nightowl which set me straight. The only takeaway I didn’t take away was his single-stream output which merged his many inputs into a single output which he sends to OBS, but that works for his setup. He still retains control over all of his inputs and outputs so he can include or mute whichever he needs to at the time, so if that’s the kind of setup you’re looking for, be sure to check out his video for his setup information.